Note: Check out the 2017 & 2018 updates below!
Note 2: We upgraded our floor in 2020 so more info coming soon!
Also check out the CAMERA I used for the TIMELAPSE here (2020 version): https://amzn.to/2QrRY3P
Our small community has been drifting from gym to gym for years. Some people treated us very nice; some others, not so nice.
But even after all this gym hopping, we still didn’t have access to a place with a solid spring floor.
So we decided to build our own.
If you’re a tricker, chances are that you’ve thought about this many times before. If not, you will soon, as the topic is definitely trending nowadays. Tricker House, Beastwood, SGTF, and many more have already done it.
I’m here to convince you that it’s worth it, and once you’re convinced, help you figure out how to do it.
Other reasons to build your own floor:
- Save on gym fees. While it’s true that the up-front investment is huge, the long term payoff is worth it, especially if you split the cost among 3 or more people. Just think of it like paying for a year’s worth of sessions in advance.
- Unlimited floor time. You can trick 24/7 on your own floor.
- Take shit from no one. You won’t have to explain yourself to close-minded gym owners and other gatekeepers.
- The pleasure of owning a f’ing spring floor. Enough said!
Let’s get started!
Anatomy of a spring floor
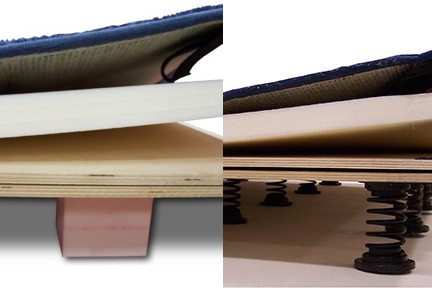
First of all, the basic anatomy of a spring floor can be broken down into three layers:
- At the very bottom, you need something to give bounce. Common solutions are either springs or foam blocks. Springs are more expensive (~ €1.3 or $1.5 per piece) and harder to install, but are supposed to last longer and give better bounce (both anecdotal evidence). Foam blocks are cheaper (~ €0.5 or $0.6 per piece), and easier to install. Personally I haven’t noticed a big difference tricking on foam blocks vs tricking on springs.
- Over that you need plywood, to distribute the force evenly among the bounce layer. Good plywood should be able to take a lot of force and bend without breaking.
- Finally, you need a top layer to make the bouncing surface soft and absorb the damage, because crashing directly on plywood is not fun at all. Carpet-bonded foam rolls is the norm in gymnastic gyms, but since it’s pretty expensive, people are exploring various alternative options for this layer. Puzzle mats, judo mats, wrestling mats, custom carpets, or combinations of these are all fair game here.
After evaluating our options, we decided to go with foam blocks for the bottom layer and thick puzzle mats for the top, so this is what we’ll discuss in this guide.
If you want to use springs or other materials, I’ve included various helpful resources at the end of this article.
Moving on…
Make your plan
We made our plans at build time, but I wish we had figured them out sooner. It really pays to have certain things figured out in advance.
You’ll be able to calculate material quantities and total cost easier, and you’ll also be able to communicate the point more effectively to other people, especially those who help you build the floor.
Here’s what you’ll need:
P1 – A plan for plywood placement
Measure the space you have and decide on the dimensions of your floor. This sounds obvious, and the only thing you need to know is that usually, plywood comes in sheets of 122cm x 244cm (4′ x 8′)1.
If you’re building in an open area, it helps a lot to limit your floor size to a multiplier of the above dimensions, to save in processing fees and time. Otherwise, simply calculate how many of these you need based on your available area, and cut the excess plywood.
Most gyms cut the sheets in half (122cm x 122cm or 4′ x 4′). We didn’t. We used the full size as it was easier and saved us on processing costs. I’m not sure if this will cause problems in the long run, but we haven’t noticed anything so far. Most people who build custom floors do it this way.
That said, if you want to assemble and disassemble your floor often, it’s best to cut them in half so they’re easier to carry around.
Common spring floor dimensions are 10m x 10m (32′ x 32′) and 12m x 12m (40′ x 40′). Our floor is 5m x 10m (16′ x 32′) so all the plans in this guide are for these dimensions. Adopt to your own accordingly.
Once you’ve calculated your area, keep in mind that you’ll need two layers of plywood. The top layer is used to cover the weak connection points of the bottom one 2.

P1 Legend: Δ is a full sheet (122cm x 244cm or 4′ x 8′). O is half of a sheet cut width-wise (122cm x 122cm or 4′ x 4′). [] is half of a sheet cut length-wise (61cm x 244cm or 2′ x 8′). X is a quarter of a sheet cut both width- and length-wise (61cm x 122cm or 2′ x 4′). There is a misplaced line in the top layer diagram.
P2 – A plan for foam block placement
You need 32 foam blocks (or springs) per sheet 3, but I’d suggest you get at least four sheets worth of extras, just to be safe in case of breaks. We used our extras along the perimeter of our floor, since it’s placed in an open space.
As for the blueprint, we drew ours on paper, and then used measures and pencils to mark each plywood individually. This was a bit tedious though… I’ve seen other people make the plan on a big piece of paper and just lay it over the plywood, which would be more efficient.

P2. Basically four rows of eight blocks each. Make sure the blocks have the same distance across the whole floor by placing them closer to the sides.
P3 – A plan for the velcro system
This is a simple but powerful material that will hold the plywood together and keep your floor from moving sideways.
We used 5cm (~2″) thick tape, cut into 5cm x 5cm (2″ x 2″) and 5cm x 10cm (2″ x 4″) strips that covered all corners and connection points. We stapled the loop part to the bottom layer and the hook part to the top one.
It worked like magic.

P3. Shown above is one sheet of plywood. You need velcro across the perimeter as well as in the center. If you cut the sheets width- or length-wise, the pattern still works. Also works for both top and bottom layer.
Acquire your materials
Next, let’s look at each material individually and discuss the exact specs.
Foam blocks
This was a bit tricky for us. We visited a lot of local stores and called many more, but we couldn’t find them anywhere in Greece.
| Material | Closed cell polyethylene (PE) foam (also called minicell foam) |
| Dimensions | 7.62cm x 7.62cm x 7.62cm (3″ x 3″ x 3″) |
| Quantity | 32 blocks x 16 plywood sheets = 512. We got 600 total, for the reasons mentioned above. |
You should Google both of the above terms (minicell and closed cell polyethylene) when looking for a place to buy them. Hopefully it’s going to be easier for you.
The same material is also used for canoe and kayak outfitting, flotation, padding, insulation, etc. So if you can’t find them close to home, you might want to check for places that import them for these reasons.
Anyway, we imported ours from a company called Foam For You Inc in the US. Their website looks crappy, but their email support is top notch, and they really went out of their way to help us with special shipping requests.
Wherever you order from, make sure they can cut the foam into your desired dimensions. We used 7.62cm x 7.62cm x 7.62cm (3″ x 3″ x 3″) which is a good default size, but anything between 7cm-10cm (3″-4″) should work great 4. I’ve seen floors with smaller blocks or other custom configurations and they still work ok, so don’t stress about it too much.
Plywood
This is the easiest material to get. In fact, most companies that sell spring floors offer a DIY kit with locally sourced plywood, to cut down on shipping costs.
| Material | Birch or baltic birch |
| Sheet dimensions | 122cm x 244cm x 9mm (4′ x 8′ x 3/8″) |
The most important point here is that you need plywood made of birch. Anything else is not flexible or strong enough and will eventually break.
We used 9mm (3/8″) thick sheets for both layers, but anything from 9mm to 15mm (5/8″) would work. I’m not sure how the extra thickness affects the floor, but I would assume it makes it harder (and possibly longer lasting).
There are a few people who use different thickness plywood for the top layer, or even a different, cheaper material 5. Again, don’t stress about it too much. Just make sure the bottom layer is birch.
The last thing to keep in mind is that price increases by a lot as thickness increases. I would stay with 9mm for the best bang for your buck.
Once you have your plywood, you should have a woodworker cut the sheets according to plan (P1). Cutting them yourself is not advised, as it takes a lot more time and it’s error prone. Only do it if you’re experienced.
Puzzle mats
We went with these for the top layer because carpet-bonded foam was way too expensive for us.
| Material | EVA Foam Mats (the typical dojo puzzle mats) |
| Dimensions | 100cm x 100cm x 4cm (3.2′ x 3.2′ x 1.5″) |
| Density | 90 kg/m3 |
To save even more money, we decided to import ours all the way from China. This process was really long, tedious, and out of scope for this article, but it worked out well. 6
In the end, the mats turned out a little bit slippery and harder than expected. We’re still working on fixing the slippery part, but choosing mats of smaller density should fix the latter issue.
If you decide to go this route yourself, expect this step to be fairly easy, as puzzle mats are widely used in most countries. Just contact your local sports or gym equipment store.
Extras
- Velcro tape: This is super important and prevents the floor from sliding to the sides on impact. You’ll need both hook and loop. We used one 25-meter (82′) roll of 5cm (2″) width for each, and it was just enough for our floor.
- Staple Gun & Staples: Used to staple the velcro on the plywood. At 4-5 staples per velcro strip in P3, we used less than 2000 staples for the whole thing.
- Silicone Glue & Gun: We used silicone to glue the foam blocks to the plywood, and tried two different kinds. I’m no expert at this, but the white, thick kind worked better than the transparent one. Any kind of glue that sticks to wood should do the job. You can ask for advice at your local hardware store. We used at least 5 full bottles of these, so make sure to get enough!
Step-by-Step Guide
Once you have everything in the gym, you can start building!
Keep in mind that there is no perfect way to do this, so feel free to mix, match, and optimize the process however you want.
These are just the steps we followed:
- Clean the side of plywood that you are going to stick the foam blocks to (optional). Dust or splinters might prevent the foam from sticking properly, and you’ll have blocks falling off during assembly. We only did this because our plywood was a bit dusty. If yours is polished or clean, you can skip this part.
- Mark plywood for foam block placement according to plan (P2).
- Stick foam blocks to plywood and let dry.
- Staple velcro to plywood according to plan (P3).
- Arrange plywood together according to plan (P1).
- Clean puzzle mats and place on top. (Optionally arrange them in a cool pattern with your community’s initials!)
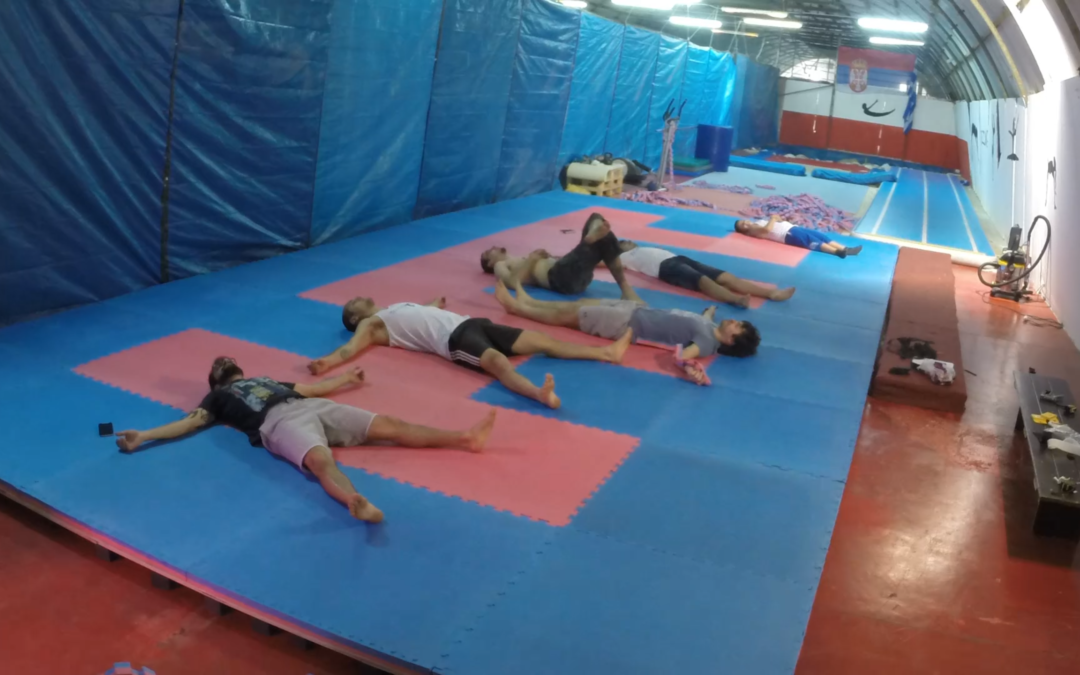
- Session! The floor wouldn’t be complete without throwing a few tricks on it.
And that is all!
Here is the time lapse video we made of the process:
Camera I used for the timelapse (2020 version): https://amzn.to/2Tn1irl
Final thoughts
Overall, the process is a bit tedious, but really fun, especially as you’re getting closer to the final product.
Our main sticking points were tool related, like running out of glue, not having a stapler, not having an extra silicone gun, and so on. The more people and tools you have, the faster you can finish the whole thing. Ideally you want two or more teams working simultaneously for each step listed above.
As for the floor, it turned out great in terms of bounce! We were all pleasantly surprised with the result. The puzzle mats are a bit slippery, so like I mentioned previously, I would try a different density or design if I could buy them again from scratch.
I really hope that this guide will inspire you to build your own floor, and I would love to help you out!
If you have any questions, feel free to message me on our Facebook page.
For a detailed list of materials and costs, as well as a list of links I used to come up with my plan, take a look at the appendix.
Looking forward to tricking on your floor! 🙂
2017 Update
The floor works perfectly!
It stopped being slippery a few weeks after the installation. It was probably factory dust on top of the puzzle mats that took a couple of mopping attempts before it disappeared completely. Also we had a 110kg (242lbs) man do flips on it and it held out pretty nicely! haha
We did a quick maintenance to the floor, just to clean underneath it. Everything fine! Only a few of the foam blocks had become unstuck so we glued them back into place. You can see the 1 minute video here.
We also had quite a few people message us and tell us they built their floor using this guide. Thank you all! We’re very glad to have helped the community even just a little bit!
2018 Update
Still very strong after hundreds of people jumping on it on a regular basis. No breaks or problems so far.
Our friend Alex from Italy made his floor using this guide last year. Since then he has been experimenting with many different foam block types, including higher blocks (20cm or 8″) and blocks from EVA foam. Higher blocks don’t add any noticeable bounce, but the EVA foam does make a difference! It’s only a tiny bit more expensive than XPE, so it’s probably a worthwhile investment.
After jumping on many different floors during various gatherings, it feels that springs are the best option in terms of bounce. And the softest floors have at least 5cm of carpet-bonded foam roll on top. The floor at Hooked for example has 2cm of puzzle mats over the plywood and 3.5cm of foam-bonded carpet on top of that. Probably the softest thing I’ve ever bounced on!
We are planning a floor extension & upgrade within 2019 so stay tuned!
Footnotes
- Actually our plywood came in dimensions of 125cm x 250cm (4.1′ x 8.2′) which is a bit unusual, but I’ve adopted the rest of the article to the default dimensions. ↩
- By the way, there are people that don’t do this. If you go this route you’ll need a lot of H connectors between sheets and a good velcro system to hold everything in place. Check out the J & R Gymnastics video in the appendix. ↩
- I found that this is the easiest way to think about it. If it helps, it’s equivalent to 1 block per square foot or 10.24 blocks per square meter. ↩
- For example, this floor by Carolina Gym uses 10cm x 10cm x 10cm (4″ x 4″ x 4″) foam blocks. ↩
- For example, these guys use OSB board over BC plywood. I guess it works, but it doesn’t look very solid to me. Let me know if you try it out. ↩
- It took 2.5 months end to end, from first contact with the seller to receiving the mats in the gym. There were also a lot of traps along the way, but in the end the payoff was worth it. The final price for each mat was about €26.5/m3 including shipping and import taxes, saving us at least €675 before shipping. Win! ↩
Appendix
For a list of materials and total costs, take a look at this spreadsheet.
When deciding on the how to build our floor, I looked at the specs of various real gymnastics floors from different companies. These are the ones that were most useful:
- I got the number of foam blocks to use per plywood sheet from USA Gym Supply’s Spring Floor Specs
- I confirmed the use of baltic birch for a long lasting floor from Carolina Gym Supply’s Spring Floor Text
This is also a great video that pretty much explains the whole process of building a floor with foam blocks: How to build the ultimate spring subfloor for your Judo, Jujitsu and Wrestling mats. Which in turn was inspired by this article: The Quest for the Perfect Judo Floor.
If you want to use springs instead, this is a great video of my friend Steven French explaining how they built their floor at Beastwood. Also big thanks to Steven for answering all my private questions and being super helpful in general! <3
Finally, for some inspiration to get you going, just have a look at these:
- Tricksrael building their floor in Mabuza. They bought their floor from Carolina Gym Supply company mentioned above.
- Time lapse video of the J & R gymnastics New Braunfels spring floor upgrade. Interesting to see how they use a heavier velcro system on a single layer of plywood.
- This could be you: Dale Nickerson tricking on his basement spring floor made with tires, plywood, and puzzle mats.
Enjoy!